
My first electric
This was the first guitar i made. Part of the inspiration came from a good friend of mine buying a cheap electric guitar package, it was badly set up and he gave me permission to tweak it. In the process i bought some bits and pieces and set about making my first electric.
I'll share some of the things i learnt in the process so that if you're thinking about doing something similar then you may not make the same ones as me (they'll be highlighted in bold).
Some background
the amount of tools one may need is large, i used all sorts of things the most of which are listed here
- A router - i had a 1/4" router and now have a 1/2" (more on that later)
- Jigsaw
- Belt sander
- Sanding flat and selection of sanding grades
- Chisels
- Plane
Starting out
Templates are the most important thing, i made one for the body,the pickups, control cavity and the jack plug (i used a hard-tail bridge so no need for a tremolo). As i bought a neck i didn't need to make any for that, but i did need to do something for the neck pocket, some straight edges and clamps sorted that one. There are templates and plans available on the net but i think anyone thinking about making guitars will need to become proficient in making templates. I got the plan of mine by copying a friends strat-o-like, the dimensions i used were a little large
For the wood (argubly the most import aspect) I had some kitchen worktop left over from installing my kitchen. I think it's beech and it's edge laminated, this is rather below the standard of just about any professional guitar, but it does sound OK, and it was my first one (don't use that fantastic bit of curly maple for your first guitar). This is where i made my first mistake and it's a biggy - Make sure you align the template with the grain before you start cutting - even if that means you only get one body out of a bit of wood . My excuse was that i hadn't really expected to make a guitar out of my first attempt and would therefore have enough wood to have another go, but it didn't turn out that way. Oh and this wood was a little thick, so given i make it a little large too the body is quite heavy (i'll weigh it at some point
So templates made i cut the body out with my router rough it out with a saw first - i didn't and i cut into the body and blunted my cutter . Oh and make sure the bearing is running on the template that's helpful too! I hand-held my router this time as i didn't have a router table, this was OK for most of it but really difficult to keep it vertical while i did the horns, a router table is a good idea.
Blank made
Once the blank is made, the neck pocket has to be cut, the technique i used is described here. I'd do it again but the really important thing is the middle bit needs to be a good fit with the end of the neck. Although some factory made strats have mickey mouse ears at the corners of the pocket i left mine radiussed although not quite enough so there was lots of sanding by hand afterwards. The neck was a bit too tight and so once finished needed some more work but it was only minor really.
Cutting the pickup and control cavities isn't too hard but be careful of the centre line. I then radiussed the body with a r6mm cutter. The next bit is making the arm and back cuts - i enjoyed this bit. Using a variety of planes, chisels, and belt sanders i cut out some relatively deep cuts and kept going until it felt comfortable. Here are some pictures (i didn't take many through the build, something i'll rectify when i do it again).
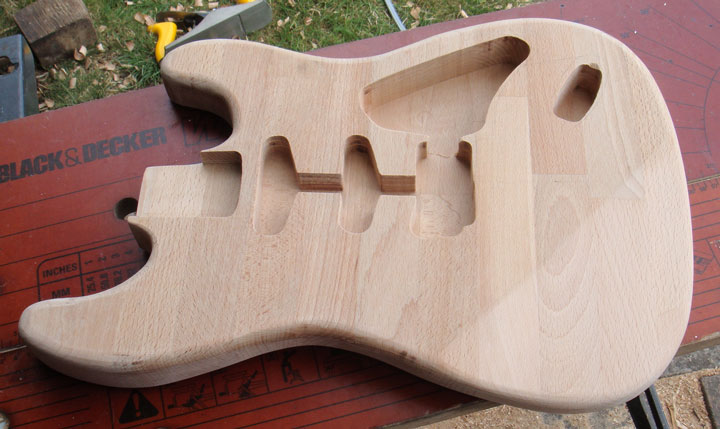
Don't look too closely at the straight cut for the arm. Also notice the grain direction - Doh!
Yes the bridge pickup is larger than the others, i had thought i might experiment with a humbucker in this position, i still might.

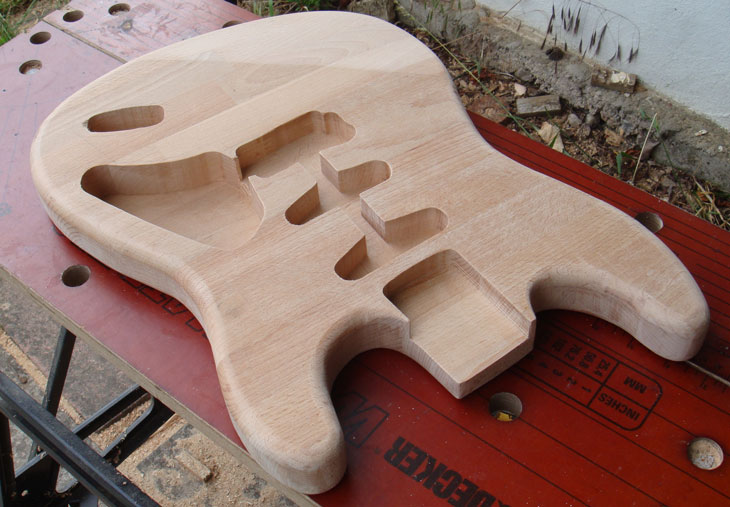
The tummy cut, deep, almost to the midline, in the vintage strats this isn't a compound curve (and there was no fixed way it should be) this isn't much of a compound curve.
Finishing
So sand all over with 120grit, two coats of sanding sealer and then work down the grits to about 400. Now i planned to paint my guitar and used acrylic enamel, two coats of compatible undercoat then three of colour, with a light sand between coats, leaving each for about 12hours. I had thought about putting a pair of stripes on but i couldn't get these to be clean/crisp enough. Sanded flat to 800grit before finally i put a number of coats of clear on again a light sanding between coats.
After i had a sufficient number of coats of paint, i sanded the guitar flat with grades of wet and dry, starting with 400 and working up to 2000 i think. The 400 stuff cuts through pretty quick so be careful. I went through the clearcoat in at least one area and had to put some more on. It's easy to see when you've done it because the slurry changes colour.
When it's flat it should be a uniform matt finish with no deep scratches. I then used ScratchX swirl remover to polish out the matt finish. This is an abrasive polish designed for cars but worked really well on my acrylic finish. Finally a wax/polish (non-abrasive) again designed for cars to give it a really high gloss shine (some pictures below).
Electronics
As an electronic engineer i wanted my guitar to be something of a test-bed but i also wanted it to sound OK (i didn't expect greatness). Firstly however i shielded the cavity with aluminium foil and spray adhesive. I used a large overlap between pieces to ensure continuity and tested with a meter.
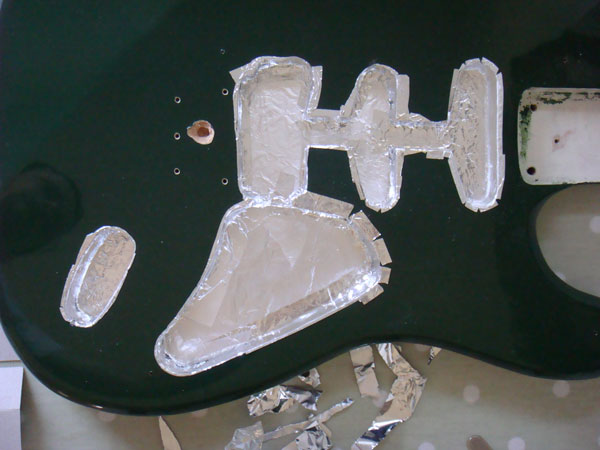
Foil shielding around all the electronics, note hole for earth wire to bridge
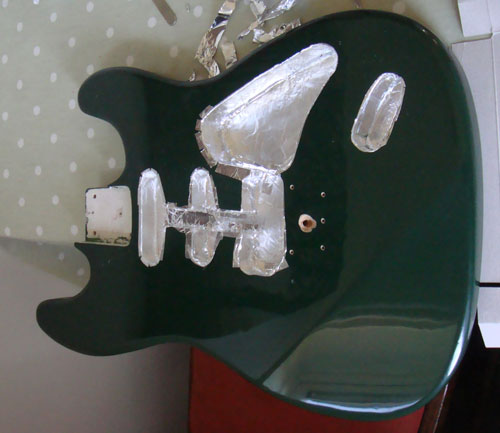
Finished body, just needs the hardware.
Fitting the neck, and hardware
The neck was second hand (ebay is a wonderful thing?) which meant that it had pre-drilled holes where it was mounted before. While i did quite a good job of getting the holes in the right position it wasn't good enough and the neck rotated as i did it up. Off with the neck to drill out the holes and plug with glue and some scrap beech dowels (made by hand, a coring drill would be nice). After pilot drilling and refitting all sins were forgiven and the neck nice and straight.
Finished photos
Yes well, i must take some and put them up... watch this space
Latest news
Study finished
Feb 8 2015
The study's now finished too. Next job Bethea's room.
Kitchen is finished (honest...)
Jan 10 2015
Skirting, architrave all done. Needs some paint here and there and the chandelier thing needs making but anyway - on to the study.
Kitchen is finished
Dec 3 2014
The kitchen has been defined as finished... Back to work this week.
Extension has started
Sept 15 2014
The extension has started, more soon.